

Dead zones, dropped calls, and slow connections in distant rooms can make home Wi-Fi frustrating. A mesh system uses a main unit and satellite units to extend one network across your home.
This guide walks you through choosing locations, connecting the system, and checking coverage. Setup usually takes a few basic steps, though exact app instructions vary by brand and internet provider.
What You Need
Gather your modem, mesh units, power adapters supplied with the system, a compatible phone or tablet, and your internet account details. Check whether your provider’s modem also acts as a router, and consult its instructions if you need to change its settings. These systems are examples from our Mesh Wi-Fi Systems guide and networking category.

Pros
- Three-router mesh system
- Supports gigabit internet plans
- Built-in Thread and Zigbee hub
Cons
- Some security and management features require a separate subscription
- Skip if you need those features without a subscription
Pros
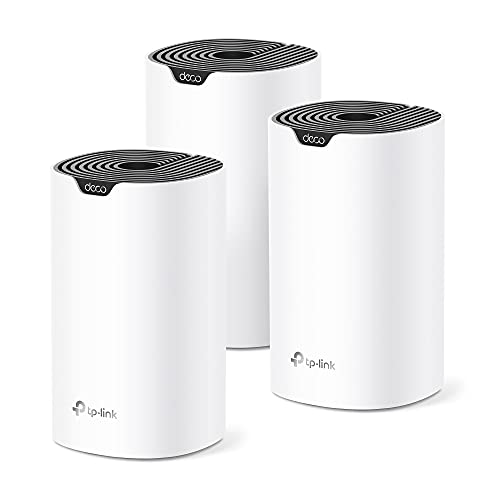
- Three-unit mesh system
- Single network name across units
- Six Gigabit Ethernet ports
- Wired Ethernet backhaul support
- Parental controls with family profiles
Cons
- Most providers require a separate modem
- Who should skip it: users seeking an all-in-one modem and router
How to Set Up a Mesh Wi-Fi System
Step 1: Check Your Internet and Existing Equipment
Confirm that your internet service is active and identify which device connects to the provider’s line. Most internet services need a modem, and the mesh system connects to that modem by Ethernet. If your provider supplied a combined modem-router, check its documentation for how it works with a separate mesh system.
Compare your internet plan with the mesh system’s stated capabilities. The eero 6+ listing specifies support for plans up to a gigabit, while the Deco S4 is an AC1900 system. Those labels describe different product specifications and do not guarantee a particular speed in every room.
Step 2: Choose a Central Location for the Main Unit
Place the main mesh unit near the modem and, where practical, in a central, open area. Avoid hiding it inside a cabinet or placing it behind large obstacles. Keep it near a power outlet and within reach of the modem’s Ethernet connection.
Follow the manufacturer’s placement and ventilation guidance. Do not cover powered networking equipment or put it where it could get wet, overheat, or be pulled down by a child or pet.
Step 3: Connect the Main Unit
Use an Ethernet cable to connect the modem to the mesh unit’s internet or WAN port, following the device labels and its instructions. Connect the modem and mesh unit to power. If the modem has a backup battery or the provider gives a specific restart sequence, follow those directions.
Wait for the devices to start up before continuing. If the app cannot detect an internet connection, check the cable ends and confirm that the modem is online before resetting anything.
Step 4: Set Up the Network in the App
Install the manufacturer’s app on a compatible phone or tablet, then follow its prompts to create the network. Choose a network name and a strong password. App screens and setup steps differ by model, so use the manufacturer’s instructions rather than guessing at settings.
Keep your network password somewhere secure. If you replace an existing router, using the same network name and password may allow many of your devices to reconnect, but some devices may still need to be joined again.
Step 5: Place the Additional Mesh Units
Put satellite units between the main unit and areas with weak coverage, not at the farthest dead zone. Each satellite needs a usable connection back to the mesh network. Use the app’s guidance if it offers a placement check, and adjust locations if the connection is poor.
Coverage figures are manufacturer claims, not guarantees for every floor plan. Walls, building materials, interference, and unit placement can affect actual coverage. Add units only where needed, and check the product’s instructions before mixing models or generations.
Step 6: Connect Devices and Check Coverage
Connect phones, computers, televisions, and smart-home devices to the new network. Walk through the rooms where you use Wi-Fi and check whether calls, streaming, and browsing work reliably. If a room still has a weak signal, move a satellite closer to the main unit or to a clearer, more central spot.
For stationary devices, Ethernet may be an option if your mesh unit has an available port. The Deco S4 three-pack lists six Gigabit Ethernet ports total and supports wired Ethernet backhaul. Check the specific unit’s instructions before connecting devices or configuring wired backhaul.
Common Mistakes to Avoid
Do not place every satellite at the edge of the weak-signal area. A satellite needs a solid connection to the rest of the mesh, so a location deep inside a dead zone may not improve coverage.
Avoid connecting the mesh system to the wrong modem port or changing provider equipment settings without checking the provider’s guidance. If both the provider’s router and mesh system manage the network, ask the provider or mesh maker how to avoid conflicting setups.
Do not assume advertised coverage or device capacity will match every home. Treat stated coverage and supported device counts as product claims, then assess performance in your own rooms and with your own connected devices.
Do not reset the modem or mesh system as a first step when one device has trouble connecting. Check power, cables, the app’s connection status, and the device’s saved network details first. A reset can erase settings and mean setting up the network again.
Recommended Gear
A standalone Wi-Fi router may suit smaller homes that do not need multiple access points. For a mesh setup, the mesh systems category provides related options to compare.
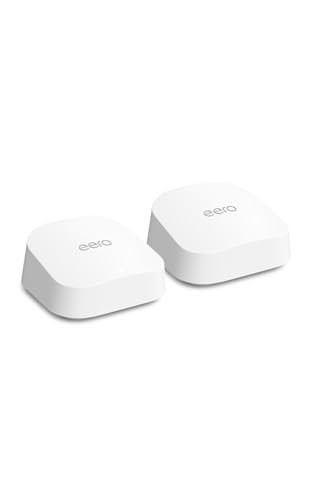
Amazon eero 6+ mesh wifi system: The listing specifies support for internet plans up to a gigabit, coverage up to 4,500 square feet for the three-pack, and 75+ connected devices. It also includes a smart home hub for compatible Thread and Zigbee devices and uses the eero app for setup. Pros: Wi-Fi 6, a stated 160 MHz channel, app-guided setup, and a built-in compatible-device hub. Cons: Its stated coverage is lower than the Deco S4 listing, and some additional security and network-management features require a separate subscription. Who should skip it: Buyers who prioritize the larger stated coverage area or do not need its smart-home hub features.
TP-Link Deco S4 Mesh AC1900 WiFi System: The three-pack listing claims coverage up to 5,500 square feet, support for up to 100 devices, and six Gigabit Ethernet ports across its three units. It supports wired Ethernet backhaul and includes parental controls. Pros: Higher stated coverage, multiple Ethernet ports, and app-based setup. Cons: It is an AC1900 system rather than the eero 6+ Wi-Fi 6 system, and its coverage claim still depends on home layout and placement. Who should skip it: Buyers seeking the listed Wi-Fi 6 features or eero’s built-in Thread and Zigbee hub.
Frequently Asked Questions
Does a mesh Wi-Fi system replace a modem?
Usually, no. The Deco S4 listing says a modem is required for most internet providers. Check your provider’s equipment requirements, then connect the mesh system to the modem as its instructions specify.
Where should I put mesh Wi-Fi units?
Place the main unit near the modem and satellites between it and areas that need better coverage. Keep units in open locations and use the app or manufacturer guidance to check placement.
Can I use Ethernet with a mesh system?
Some systems support Ethernet connections between units, called wired backhaul. The Deco S4 listing specifically supports wired Ethernet backhaul and has Gigabit ports. Confirm supported connections and setup steps in the product instructions.
Will all my devices connect to one network name?
The Deco S4 listing specifies one network name and password, with devices switching between units as you move around. Other systems may handle setup differently. Follow the app instructions and reconnect devices that do not join automatically.
Which system should I choose for a larger home?
The Deco S4 three-pack has the higher listed coverage claim, up to 5,500 square feet, compared with up to 4,500 square feet for the eero 6+ three-pack. Actual coverage varies with building layout and obstacles, so use those figures as a starting point rather than a guarantee.




Write Your Review
No reviews yet. Be the first to share your experience!