

Moving photos from an iPhone to a computer can free phone storage and create a separate copy of important images. You can transfer them with a cable and computer, or use an external drive as an intermediate destination when your computer has limited space.
The steps usually take a few minutes to set up, though a large library can take longer. First check your iPhone connector, computer ports, available storage, and whether your photos are stored locally or in iCloud.
What You Need
You need your iPhone, a compatible data cable, and a Mac or Windows computer with enough free storage. For a separate copy or direct phone-to-drive transfer, use a compatible external drive; check the drive format and connection requirements for your devices before copying.

Pros
- USB-C and USB-A cables included
- Compact, lightweight aluminum enclosure
- SMART diagnostics and adaptive TRIM
Cons
- Skip it if you need more than 250GB

Pros
- Includes USB-C and USB-A cables
- Compact, lightweight aluminum case
- SMART diagnostics and adaptive TRIM
Cons
- Windows may show about 465GB capacity
- Who should skip it: buyers needing more than 500GB

Pros
- USB-C and USB-A connectors
- Cap-free swivel design
- No software installation required
- Three-year limited warranty
Cons
- Skip if you need more than 64GB
- Advertised speed varies by device and usage conditions

Pros
- Includes USB-C and USB-A cables
- Compact, lightweight aluminum enclosure
- SMART health diagnostics and adaptive TRIM
Cons
- Windows may show about 931GB
- Skip it if you need sustained speeds beyond cache

Pros
- USB-A and USB-C connectors
- No removable cap
- Lightweight metal housing
- Three-year limited warranty
Cons
- Who should skip it: buyers needing specified speeds above 100MB/s
How to Transfer Photos From iPhone to Computer
Step 1: Check your iPhone and computer connections
Identify the port on your iPhone and the available ports on your computer. Use a cable that supports data transfer, not only charging. If the connectors differ, use a compatible cable or adapter.
For external storage, check the drive maker’s instructions for supported devices and file systems. USB-C describes a connector, not a guaranteed data speed or feature set.
Step 2: Prepare space and choose a destination
Check that your computer or external drive has enough free space for the photos and videos you plan to copy. A drive’s labeled capacity and the space reported by a computer can differ because operating systems calculate storage differently.
If you want an extra backup, keep one copy on the computer and another on a separate drive. Do not treat a single portable drive as your only copy of irreplaceable photos.
Step 3: Connect and unlock your iPhone
Connect the iPhone to the computer with the data cable, then unlock the phone. If prompted, confirm that you trust the computer. Keep the phone connected while the computer recognizes it.
If the phone does not appear, try another compatible cable or port, unlock the phone again, and check for a prompt on its screen. Computer software and prompts vary by operating system version.
Step 4: Import or copy the photos
On a Mac, use the Photos app or Finder tools available for your macOS version. On Windows, use the Photos app or File Explorer options available on your system. Select the images you want and choose an import or copy destination.
If you use iCloud Photos with storage optimization, some full-resolution originals may need to download before they can be copied. Check Apple’s current instructions if an image is not available on the phone or computer.
Step 5: Copy to an external drive if needed
You can first import photos to the computer, then copy them to an attached drive. Some iPhone and drive combinations also allow direct saving to external storage, but compatibility, power needs, and file-system support vary. Consult Apple and drive-maker instructions before relying on a direct connection.
For a dual-connector flash drive, confirm the iPhone recognizes it and follow the manufacturer’s guidance for accessing files. A drive advertised as compatible does not guarantee every transfer method works with every iPhone or app.
Step 6: Verify the copies before disconnecting
Open several transferred photos and videos from the destination, and check that the files appear complete. Compare a few selections with the originals on your iPhone before deleting anything.
Eject the drive or safely disconnect the phone using the computer’s available option. Keep the original photos until you have confirmed that your backup is usable.
Common Mistakes to Avoid
Do not assume every charging cable transfers data. If the computer does not recognize the iPhone, check the cable, port, device unlock state, and trust prompt before changing settings.
Avoid disconnecting a phone or drive while files are still copying. An interrupted transfer can leave files incomplete, so wait for the import to finish and verify the destination.
Do not delete photos from the iPhone immediately after copying a selection. Check the files first, and remember that deleting from a device connected to iCloud Photos may affect the synced library.
Do not assume advertised drive speed will be reached on every phone or computer. The host port, cable, file sizes, and transfer method can affect actual speed. For more storage options, see our Portable SSDs category and Storage category.
Recommended Gear
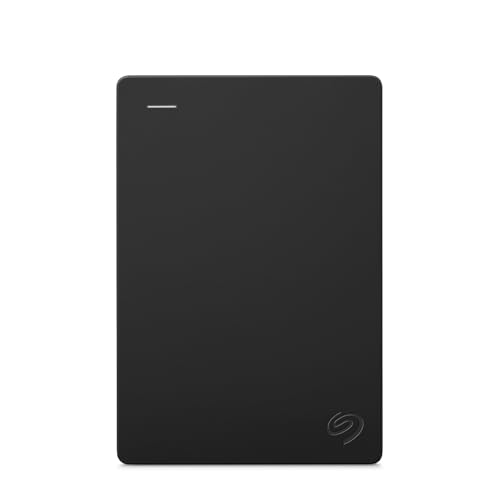
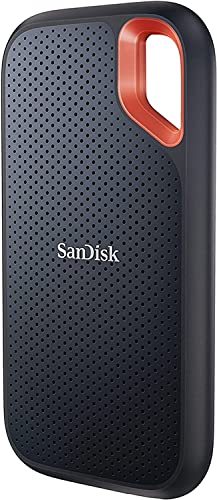
SSK Portable SSD 250GB External Solid State Hard: The listing specifies USB-C and USB-A cables, read speeds up to 1,050 MB/s, and write speeds up to 1,000 MB/s. Its 250GB capacity may suit a smaller transfer or a portable working copy. The trade-off is less room than the larger versions, and actual speed depends on the connected devices. Who should skip it: anyone who expects to store a large photo and video library on one drive.
SSK Portable SSD 500GB External Solid State Hard: This option offers more stated capacity than the 250GB model while retaining the listed USB-C and USB-A cables and speed claims. It can suit a larger transfer without moving to the 1TB version. Who should skip it: buyers who only need a small, occasional file handoff or need a confirmed direct-iPhone workflow.
Lexar D40E 128GB Dual USB 3.2 Gen 1 Type-C Jump: Its USB-C and USB-A connectors can help move files between compatible devices, and the listing specifies transfer speeds up to 100 MB/s. It is smaller capacity than the SSK SSDs and its listed speed is lower, so it suits modest transfers more than large libraries. Who should skip it: anyone needing high-capacity storage or SSD-class speeds.
For smaller files that move between phones and computers, compare the microSD card guide too, but verify that your devices support the card format and any required reader.
Frequently Asked Questions
Can I transfer photos without an internet connection?
Yes. A cable connection between the iPhone and computer can transfer locally stored photos without internet access. Photos that exist only in iCloud may need to download first.
Can I copy iPhone photos straight to a portable SSD?
Some combinations of iPhone, drive, connector, and file system support direct saving or copying. Check Apple’s guidance and the drive maker’s compatibility instructions for your exact devices before depending on that workflow.
Why does my drive show less capacity than its label?
Storage displays can differ because manufacturers and operating systems use different unit calculations, and formatting also uses some space. The SSK listings note that their drives may show lower displayed capacity on Windows than the labeled capacity.
Will a faster SSD always transfer photos faster?
No. The iPhone, computer port, cable, file system, and transfer method can limit speed. The SSK listings state maximum drive speeds, not guaranteed speeds for every connected device.
Should I erase photos after the transfer?
Only after you verify the copied files and confirm that you have another copy if the photos matter. If iCloud Photos is enabled, review Apple’s current guidance before deleting, because deletion can sync across devices.


Write Your Review
No reviews yet. Be the first to share your experience!